
In today’s smartphone-dominated world, our devices hold our precious memories. However, accidentally deleting cherished photos happens to the best of us. This article will guide you on how to recover those lost iPhone photos, even without a backup.
Imagine a scenario where you need to check someone’s phone for specific activities, possibly involving monitoring software. But, to your dismay, essential records, like photos, have vanished. Don’t worry!We introduce 3 methods to retrieve these missing memories.
Method 1: Recover Deleted iPhone Photos from Recently Deleted Folder
Have you ever accidentally deleted a cherished photo on your iPhone and then realized your mistake? Don’t worry; there’s a way to recover it, and it doesn’t require any backup. This method involves taking advantage of the “Recently Deleted” folder on your iPhone.
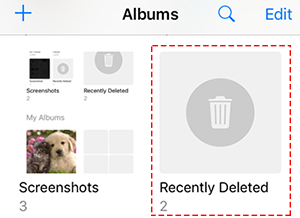
Step 1: Tap on “Albums”
Step 2: Scroll Down and Find “Recently Deleted”:
Step 3: Browse and Recover
Inside the “Recently Deleted” folder, you’ll see a list of photos that you’ve deleted within the last 30 days. Browse through this folder to find the photo you want to recover.
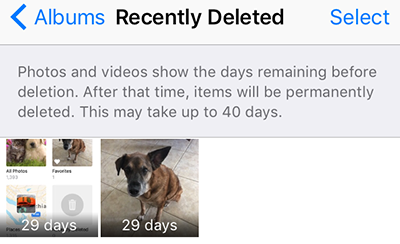
Step 4: Select the Photo & Recover the Photo
Advantages:
-
No Need for a Backup: This method doesn’t rely on any prior backup; it’s built into your iPhone’s operating system.
-
Simple and Quick: It’s a straightforward process that doesn’t require any third-party software.
Disadvantages:
-
Limited Timeframe: The “Recently Deleted” folder keeps photos for only 30 days. After that period, the photos are permanently deleted.
-
Not Suitable for Older Deletions: If you deleted a photo more than 30 days ago, it won’t be in this folder.
Recovering photos from the “Recently Deleted” folder is the quickest and easiest way to retrieve accidentally deleted photos on your iPhone. However, it’s essential to act promptly, as photos have a limited stay in this folder before they are gone for good.
Method 2: Recover Permanently Deleted iPhone Photos with FonePaw Even without Backup
When it comes to data recovery on your iPhone, FonePaw iPhone Data Recovery emerges as a potent and user-friendly tool. This method is particularly useful when your photos are permanently deleted, and you don’t have a backup to fall back on. Here’s a comprehensive guide on how to use FonePaw iPhone Data Recovery to rescue your lost photos.
Step 1: Download and Install FonePaw iPhone Data Recovery
Step 2: Connect Your iPhone & Select Data Recovery Mode
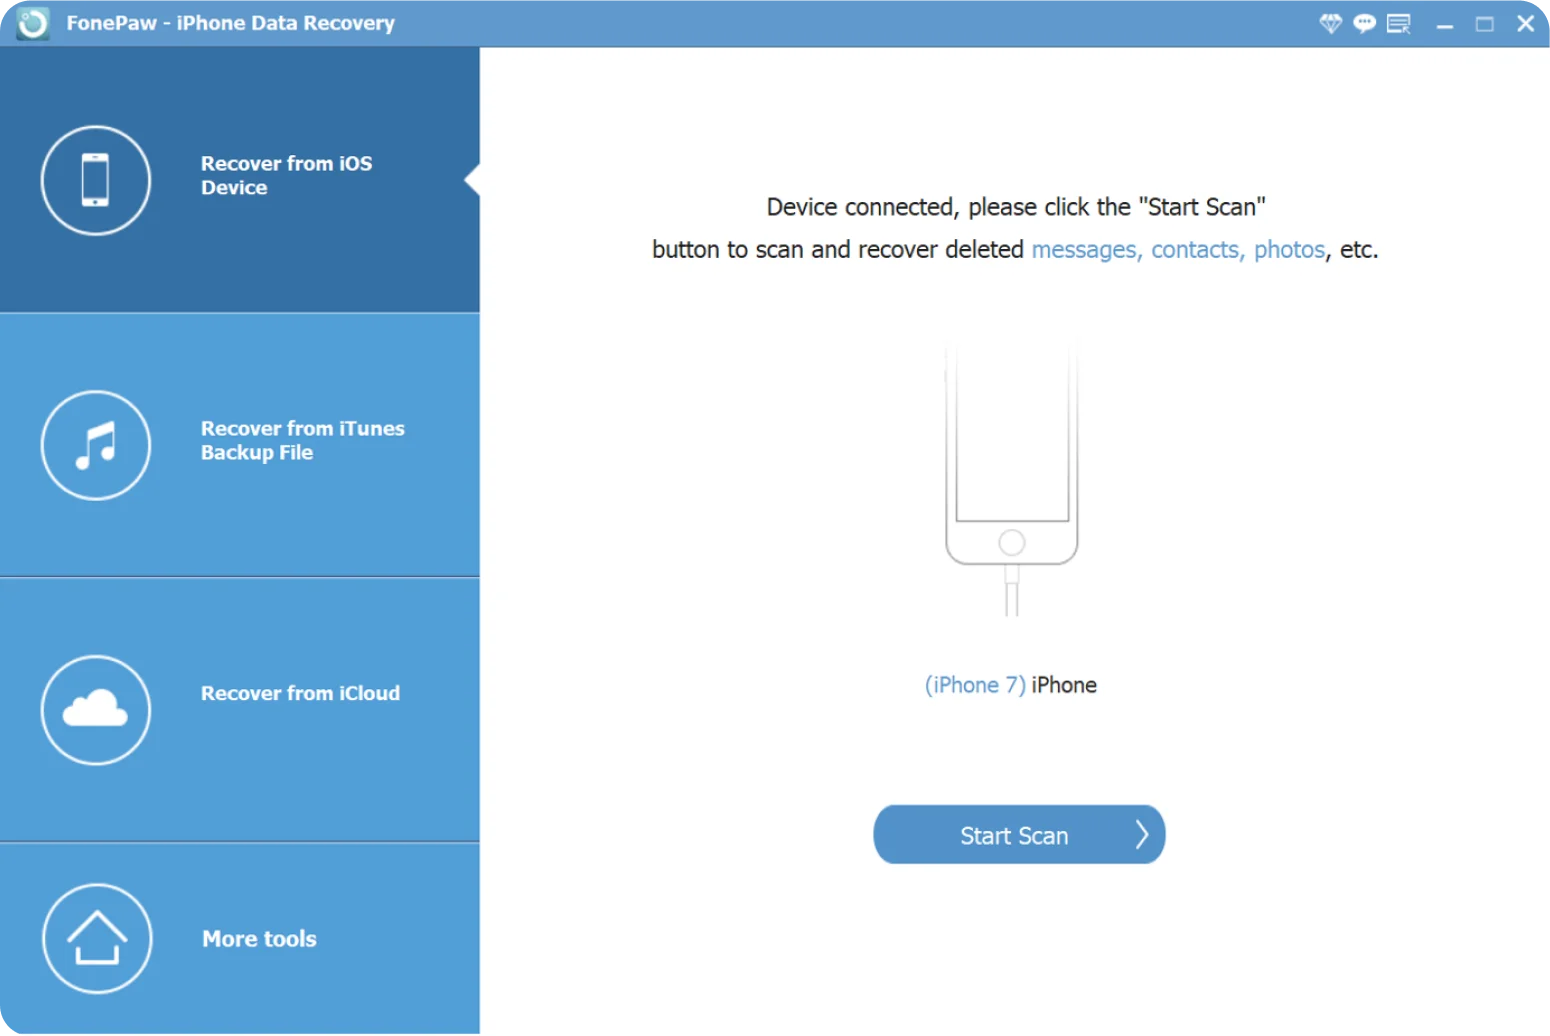
Step 3: Scan Your iPhone for Deleted Photos:
Click “Start Scan,” and the software will initiate a comprehensive scan of your iPhone’s storage, searching for deleted photos.

Step 4: Recover Deleted Photos
After selecting the desired photos, click the “Recover” button. FonePaw iPhone Data Recovery will then begin the recovery process, restoring your photos to your computer. Check storage on Mac or other computer to ensure that there is enough space available for the recovery process to complete successfully.
Advantages:
-
High Success Rate: FonePaw iPhone Data Recovery has a well-deserved reputation for a high success rate in data recovery, including photos. It employs advanced algorithms to retrieve your lost memories effectively.
-
Versatile: This powerful tool can recover not only photos but also almost 30+ file types, such as messages, contacts, call logs, videos, and more. It’s a comprehensive solution for all your data recovery needs.
-
User-Friendly Interface: FonePaw iPhone Data Recovery is designed with a user-friendly interface, making it accessible to users of all levels of technical expertise. You don’t need to be a tech whiz to use it effectively.
-
Supports Multiple Data Loss Scenarios: FonePaw iPhone Data Recovery is not limited to recovering deleted photos; it can also retrieve data lost due to various scenarios, such as accidental deletion, device damage, iOS update failures, and more.
-
Compatibility: The software is compatible with various iPhone models and iOS versions, ensuring that you can use it regardless of your device’s specifications.
Disadvantages:
-
Paid Software: It is paid software, although it often offers a free trial version with limited functionality.
Method 3: Restore Lost iPhone Photos via iCloud (Backup Needed)
Using iCloud for photo recovery is another effective method, especially if you have previously enabled iCloud Photo Library or iCloud Backup. iCloud is Apple’s cloud-based storage and synchronization service that can help you retrieve lost photos from your iPhone. Businesses can also leverage advanced cloud consulting services to optimize data storage and management, ensuring seamless operations and enhanced data recovery capabilities. Here’s a step-by-step guide on how to utilize iCloud for photo recovery:
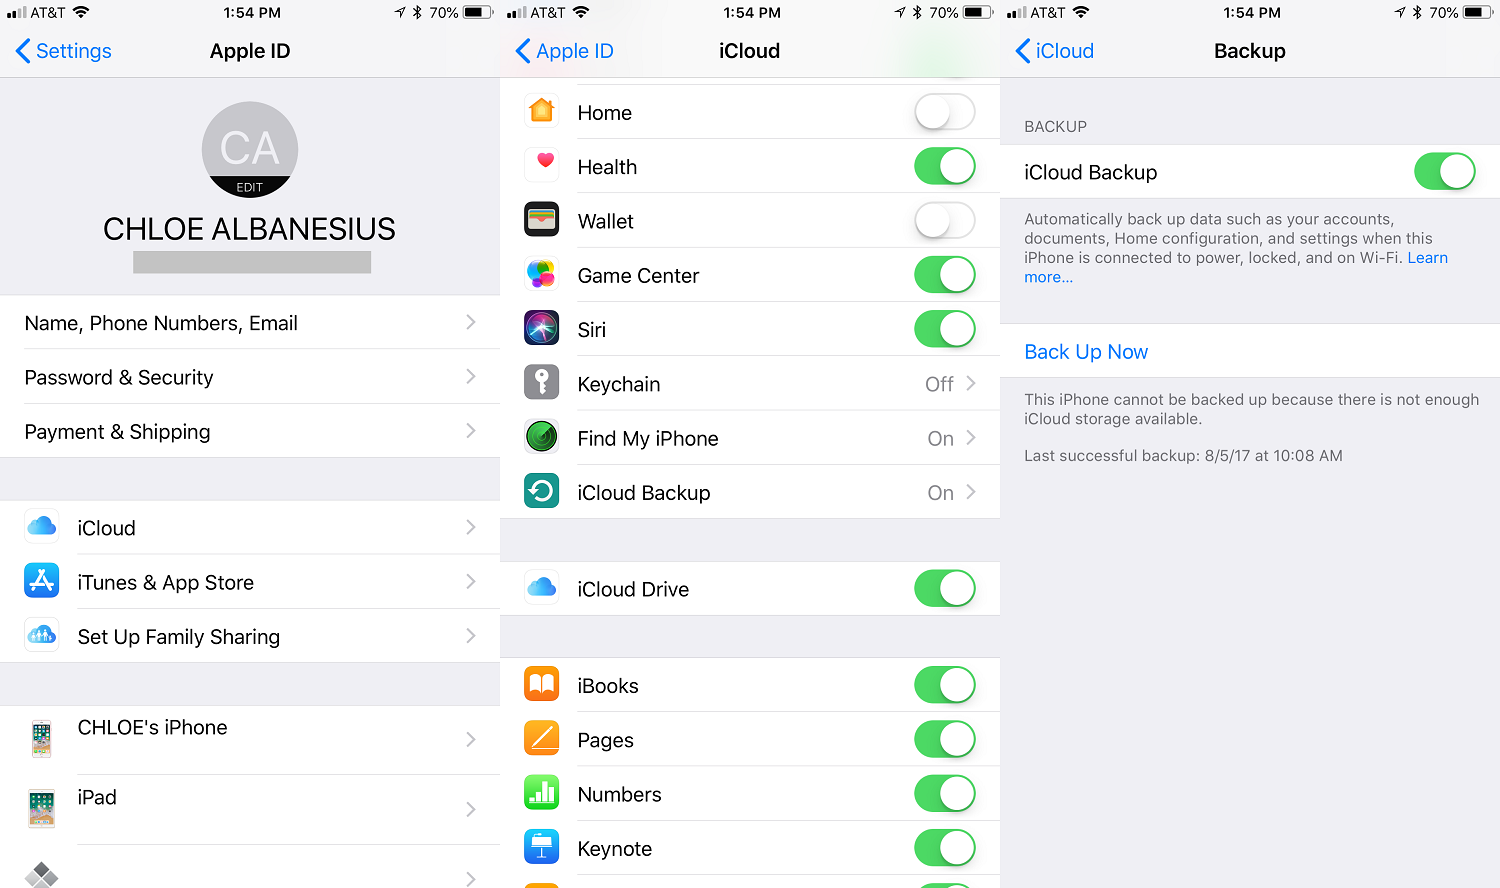
Step 1: Check iCloud Photo Library and iCloud Backup Status
-
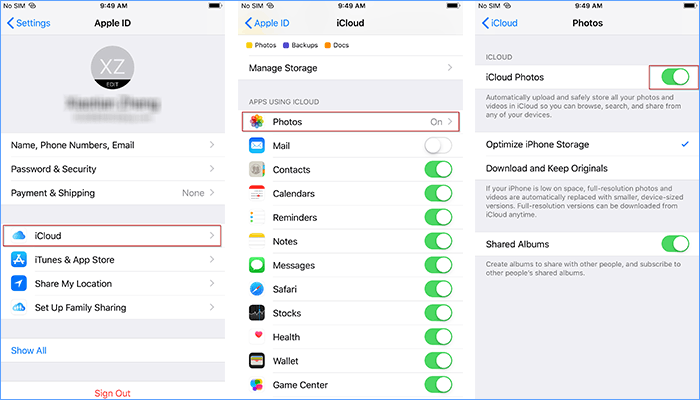
iCloud Photo Library: This feature automatically syncs your photos and videos to iCloud. To check if it’s enabled, go to “Settings” > [Your Name] > “iCloud” > “Photos,” and make sure “iCloud Photos” is turned on.
-
iCloud Backup: iCloud Backup creates a backup of your entire device, including photos. To confirm if it’s activated, navigate to “Settings” > [Your Name] > “iCloud” > “iCloud Backup.” Ensure that “iCloud Backup” is enabled.
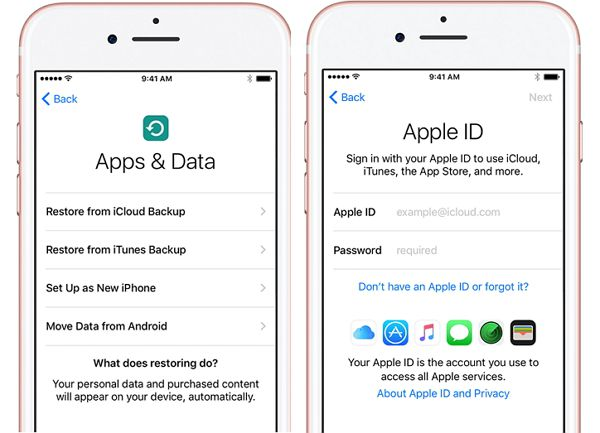
Step 2: Access iCloud Photos
To recover photos from iCloud, you can do so through the iCloud website or directly from your iPhone, depending on your preference.
Using a Web Browser:

Using Your iPhone:
Advantages:
-
Automatic Backup: iCloud Photo Library and iCloud Backup automatically create backups of your photos and other data, ensuring that you have a recent copy available.
-
Access from Anywhere: You can access your iCloud photos from any device with internet access, providing flexibility and convenience.
Disadvantages:
-
Limited Storage: iCloud offers a limited amount of free storage, and if you exceed your storage limit, you may need to purchase additional space.
-
Dependent on Backup: Successful photo recovery through iCloud relies on having previously enabled iCloud Photo Library or iCloud Backup. If these features were not active, your photos may not be recoverable.
-
Internet Connection Required: To access iCloud photos, you need an active internet connection, which may not be feasible in all situations.
Using iCloud for photo recovery is a valuable option, especially if you have regularly backed up your photos to the cloud.
Additional Tips About iPhone Photo Protection
In addition to the methods outlined above, there is a valuable tip for you to enhance your data protection and minimize the risk of iPhone data loss. The most effective way to prevent data loss is by regularly backing up your iPhone. In addition to backing up your device, it’s also crucial to protect your personal information online, and services like OneRep can help you remove your personal data from the internet, reducing the risk of identity theft and other privacy concerns. Apple provides two primary methods for this:
-
iCloud Backup: Enable iCloud Backup in your iPhone settings, and it will automatically back up your device when connected to Wi-Fi and charging. This ensures that your data is securely stored in the cloud, ready for recovery if needed.
-
iTunes/Finder Backup: Connect your iPhone to your computer and use iTunes (or Finder on macOS Catalina and later) to create a local backup. This method allows you to have a physical copy of your data on your computer.
You can also explore third-party software like FonePaw iOS Transfer for more comprehensive control over your iPhone data backups. This software offers enhanced flexibility and management options.

Conclusion
In this article, we’ve outlined how to recover deleted iPhone photos. Always start by checking the Recently Deleted album, where photos are stored for 30 days.
If you miss this window, use a third-party recovery tool like FonePaw iPhone Data Recovery. Remember, the sooner you start, the higher the chances of success with FonePaw.
This post is also available in: Português (Portuguese (Brazil)) Español (Spanish) Deutsch (German) 日本語 (Japanese) Italiano (Italian)


